My name is Holly. I am totally into art, and if you like my posts, you might consider checking the blog occasionally for more art that I see and create. I will try to fit in as many posts as I can between my homework assignments that I will probably be drowning in this year. Enjoy!
Thursday, April 19, 2012
message collage
Today, I made a message collage. The pictures were all from what remained of the Hana Hou magazines in the previous collage. Here's what you need:
magazine pencil
paper
Think up an inspiring or meaningful phrase to put on your collage. It should have a couple nouns in it, so that you can glue on pictures describing your message. Once you write down the message on a piece of paper, you can cut out pictures from magazines and glue them on next to the nouns they describe.
Other Ideas
The simplicity of this collage depends on the phrase you choose and the magazine your pictures are from. All collages look good with a border, but remember that if the collage is simple, make an outrageous, elaborate border, and that eye-popping ones need a simpler, lighter one. Also, remember that Van Gogh made up his own ideas; why can't you?
Wednesday, April 18, 2012
vacation thank-you
Today, I painted another small fraction of the outrageous amount of Hawaiian art I have done-a vacation thank-you. A vacation thank-you thanks someone who hosted you on a vacation, with a picture painted on the front of something that the place you went to is known for. I invented that, of course. Here is what you need:
blank white card paints
pencil
Sketch what you are going to paint on another piece of paper if you want to be extra prepared. Then, start painting! I did a volcano, because that's how Hawaii was formed, But if you went to Florida, you should probably do something like an orange, or maybe a boot! Don't forget the message on the inside, though.
Other Ideas
Remember, an easy way to add glitter to a painting is to just shake it on while the paint is still drying. If you want to make one thing in the painting stand out, you can add glitter to just that spot. If I had done that, I would probably have done it on the lava, but yours will probably be different. If Leonardo got to decide all the details of his artwork, you can, too!
blank white card paints
pencil
Sketch what you are going to paint on another piece of paper if you want to be extra prepared. Then, start painting! I did a volcano, because that's how Hawaii was formed, But if you went to Florida, you should probably do something like an orange, or maybe a boot! Don't forget the message on the inside, though.
Other Ideas
Remember, an easy way to add glitter to a painting is to just shake it on while the paint is still drying. If you want to make one thing in the painting stand out, you can add glitter to just that spot. If I had done that, I would probably have done it on the lava, but yours will probably be different. If Leonardo got to decide all the details of his artwork, you can, too!
Tuesday, April 17, 2012
natural pearls
Today, I made a natural pearl necklace. It was made from berries from the tree in my backyard! Here is what you need:
needle thread
seedless berries(not outrageously mushy)
Tie a knot in the thread and string it through the eye of the needle. One by one, push the needle through a berry and slide it down to the knot until the thread is full. Tie the ends of the thread together to form a necklace.
Other Ideas
If you are a perfectionist, experiment with different types of berries to find the longest lasting and best looking one. If you are more daring, though, mix different colors of berries and create a cool pattern with it. Your choices depend on the kind of person you are!
needle thread
seedless berries(not outrageously mushy)
Tie a knot in the thread and string it through the eye of the needle. One by one, push the needle through a berry and slide it down to the knot until the thread is full. Tie the ends of the thread together to form a necklace.
Other Ideas
If you are a perfectionist, experiment with different types of berries to find the longest lasting and best looking one. If you are more daring, though, mix different colors of berries and create a cool pattern with it. Your choices depend on the kind of person you are!
Monday, April 16, 2012
broken sign
Today, I made a broken sign for the oven. The dishwasher has broken an outrageous number of times, but never the oven! Here is what you need:
paper colored pencils
broken appliance pencil
Think up a funny thing to say on your sign, like Hello, I'm Broken, who are you? or My name is Bob, but people call me Broken. Add some color to it with your colored pencils and you're ready to put it on the broken kitchen appliance!
Other Ideas
A broken sign doesn't really need to be too detailed or eye-catching. Make it your goal to change that! Add pizzaz with glitter or the edges cut in a wavy, jagged, or scalloped edge. You create, you decide!
Sunday, April 15, 2012
themed collage
Today, I made a themed collage out of the Hawaiian Airlines magazine, Hana Hou. It took a lot of work and a lot of time, but it turned out outrageously cool in the end. Here's what you need:
magazine with one main theme poster paper
glue scissors
Use the scissors to cut out pictures from the magazine and glue them to the poster paper. I just realized how little writing this would take!
Other Ideas
If you do not have enough pictures to fill your paper, cut out scraps of construction paper to fill in the blank spots. Also, you can add something special to make your collage more unique! I looked through my magazines and cut out the word Hawaii every time it was mentioned, then glued it on my collage. You can add anything-tissue paper, feathers, string, glitter, beads, a border-you get to choose!
Saturday, April 14, 2012
ti leaf rose
Today, I made some ti leaf roses! I learned how in a lei making class in Hawaii, and I find it so amazing that you can make a beautiful rose like the ones in the picture out of a leaf! Here's what you need:
ti leaves or newspaper strips string, yarn, or raffia
If you are using ti leaves, freeze them for two days and let them thaw before working with them.
Fold a ti leaf into thirds the long way.
Crease it so that it has a right angle.
Do the same thing on the other side so that you have a long tail and a short tail.
Roll along the crease nearest the short tail.
Fold the long tail behind itself.
Roll along the crease you just made. Keep repeating this until the long tail is about the same length as the short tail.
Tie the two tails together with yarn or string.
Make some more!
Other Ideas
You can make this kind of art out of lots of different materials. I've seen it done with not only ti leaves and newspaper, but also tissue paper, construction paper, and magazines. You can make bouquets out of flowers of an outrageous variation of materials and colors. I did 3 different colors in the bouquet above, and it looks really great! The choice is yours!
Sunday, April 1, 2012
computer art
Today, I did some outrageous computer art. It is comical art, which makes it very entertaining. Here is what you need:
drawing software (I used Beautiful Dorena) on a computer
First, explore all the different things you can do with your software. I discovered that I could type on Beautiful Dorena, so I used that in my art. As soon as you know what your software is capable of doing, you can think about what you want to create. You can make it comical, inspiring, meaningful, or all of the above.
Other Ideas
You can print your art and add on something 3D, or email it to somebody else. You could explore the world of computer software and find out how to make animated movies too! That's art also. Remember, since there are so many different things to do with art software, you get to choose which path to follow!
Saturday, March 31, 2012
bright 3-D set
I'M HOME!!!!!!!!!!
Today, I painted an outrageously bright 3-D set. Originally, it was going to be just one painting-a light brown window looking out at a cloud, the sun, and a tree, but it didn't work out too well. Here is what you need:white painting paper 4 paint colors
paintbrushes small water bowl
Dip a paintbrush into the water, then the paint. Paint the entire paper with the color. This is color 1 in stage 1. Paint a square on the paper in a different color-color 2 in stage 2. In another color, paint a rhombus over the square, which will be color 3 in stage 3. Lastly, in a fourth color, paint another rhombus at the square's side as color 4 in stage 4. Set that aside to dry. On your next painting, put color 4 in stage 1, color 1 in stage 2, color 2 in stage 3, and color 3 in stage 4. Set that aside to dry, then do another painting with color 3 in stage 1, color 4 in stage 2, color 1 in stage 3, and color 2 in stage 4. This is where I stopped because I didn't have enough time, but you can go on to color 2 in stage 1, color 3 in stage 2, color 4 in stage 3, and color 1 in stage 4, if you like.
Other Ideas
If you want, you can go even farther, and think of other combinations of stages and colors. You could also make a chart of your set, like the one below.
color 1 color 2 color 3 color 4 color 1 color 2 color 3 color 4
stage 1 * *
stage 2 * *
stage 3 * *
stage 4 * *
color 1 color 2 color 3 color 4 color 1 color 2 color 3 color 4
stage 1 * *
stage 2 * *
stage 3 * *
stage 4 * *
Any 3 dimensional figure would work for this project, but you are the creator of your own masterpiece, so you get to decide which road it travels on!
Friday, March 30, 2012
easter tote
colored felt tulle (mine was yellow)
thread/ embroidery floss sewing machine/ needle
scissors
With the scissors, cut 2 identical rectangles, one long skinny rectangle, and one long wide rectangle out of felt. Fold the long skinny rectangle in half the long way and hand stitch the sides together to make a felt tube. This will be the handle.
For my tote, I also cut two rectangles out of tulle to decorate the sides.
I couldn't think of how to explain the instructions using words, so I made a picture.
I used my mom's sewing machine to stitch all the yellow parts, then I hand sewed the handle on.
Other Ideas
To make your Easter tote a little bit fancier, you can glue on glitter, different fabrics, buttons, or beads. You could also use embroidery floss to stitch an outrageous design on the side. Make it your own because you're the artist!
Wednesday, March 28, 2012
wedding card
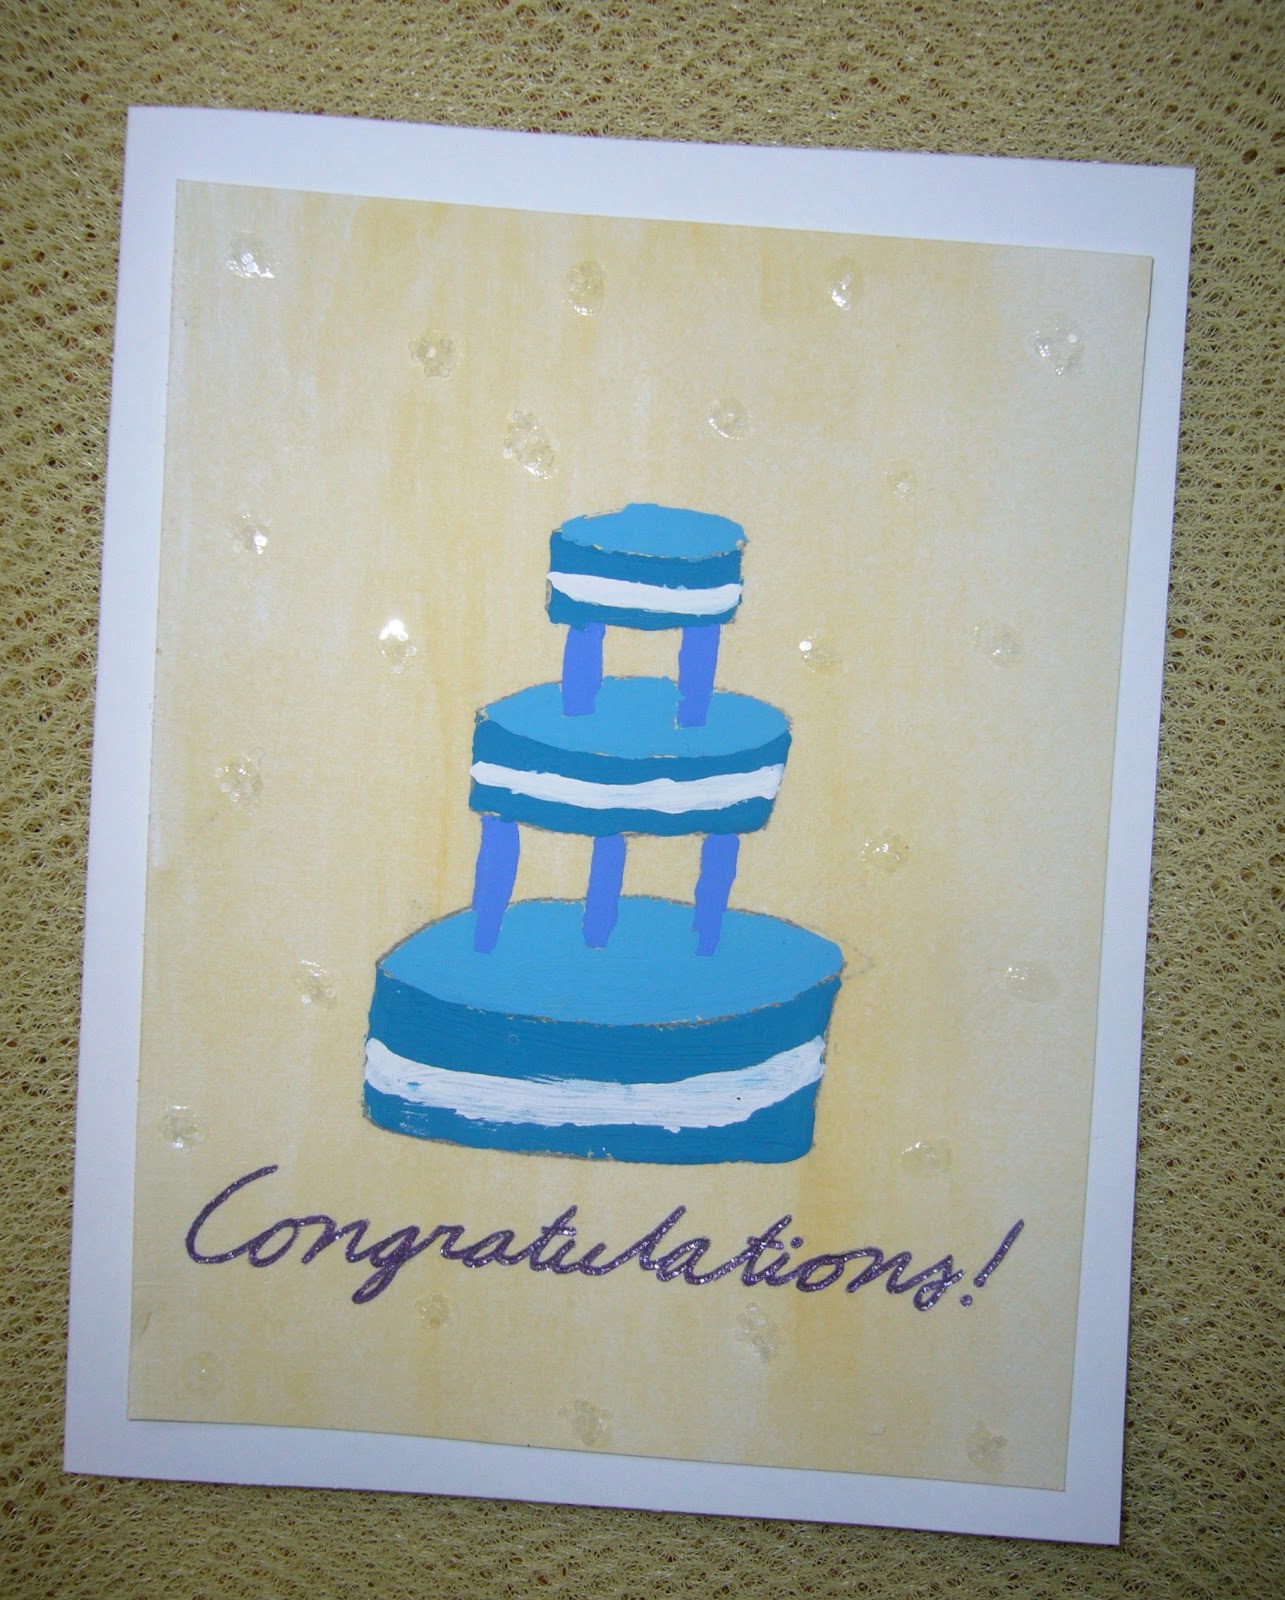
Today, I painted a wedding card. (Congratulations Randy and Michelle!!!) Here is what you need:
acrylic paint paper gouache paint
pen pencil
glue (I used Mod Podge) paintbrushes
glitter water
gluestick white card
Make an outrageously light sketch of what you want to paint (in pencil) on the paint paper. Then, paint a wash over your sketch. A wash is created by putting a lot of water into some paint, then taking a wide paintbrush and painting over a whole paper. This is the creamy background you see at left. After that, paint inside your sketch with whatever color you like. Wait for that to dry. Then, write your message in a fancy font with a fancy pen. I used a sparkly gel pen. Use a small paintbrush to apply glue dots all over the paper and sprinkle glitter over it. Using the gluestick, attach your painting to a plain white card.
Other Ideas
This style of card making can be used for thank you cards, birthday cards, holiday cards, or any other kind of card. You can also add more to your painting, like giving it a border, or gluing feathers onto it. There are many options, but you get to choose which one to follow, since you are the artist!
acrylic paint paper gouache paint
pen pencil
glue (I used Mod Podge) paintbrushes
glitter water
gluestick white card
Make an outrageously light sketch of what you want to paint (in pencil) on the paint paper. Then, paint a wash over your sketch. A wash is created by putting a lot of water into some paint, then taking a wide paintbrush and painting over a whole paper. This is the creamy background you see at left. After that, paint inside your sketch with whatever color you like. Wait for that to dry. Then, write your message in a fancy font with a fancy pen. I used a sparkly gel pen. Use a small paintbrush to apply glue dots all over the paper and sprinkle glitter over it. Using the gluestick, attach your painting to a plain white card.
Other Ideas
This style of card making can be used for thank you cards, birthday cards, holiday cards, or any other kind of card. You can also add more to your painting, like giving it a border, or gluing feathers onto it. There are many options, but you get to choose which one to follow, since you are the artist!
Sunday, March 25, 2012
persuasive cupcakes
Today, I made some persuasive cupcakes. It was my first ever batch of cupcakes, and it turned out really good! Here's what you need:
already baked cupcakes frosting
food coloring (I used the gel kind) toothpicks
paper pen
sprinkles
Put the frosting into a big bowl and dye it with any color of food coloring you desire. Then, spread the frosting all over each cupcake and put sprinkles on it. Just don't tip the sprinkle jar too much, or there will be an outrageous mess! Write little messages on pieces of paper and glue toothpicks to the back. Then, stick a sign into each of the cupcakes and you're done!
Other Ideas
Cupcakes are the best when they are shared! You can bring persuasive cupcakes to any party, and they will disappear super fast! Of course, there are so many options, but the person who does the art is always the one to decide!
| all of the cupcakes |
| my favorite cupcake |
| the recipe |
Saturday, March 24, 2012
nail art
Today, I did some beautiful nail art! I had gotten the pens for christmas, but had never even opened them. Here is what you need:
nail pens nail polish
fingernails/toenails clear nail polish
Put a layer of clear nail polish on your nails and wait for it to dry. Then, paint your nails with any color of polish you want. When the nail polish is completely dry, you can draw an outrageous design on your nails with the nail pen.
Other Ideas
If you want, you can add a little extra to your nail art, like putting sparkles on it or painting on a white tip. You could even do the white tip with a nail pen! Remember, though, when you are doing art, you get to make the choice, too!
nail pens nail polish
fingernails/toenails clear nail polish
Put a layer of clear nail polish on your nails and wait for it to dry. Then, paint your nails with any color of polish you want. When the nail polish is completely dry, you can draw an outrageous design on your nails with the nail pen.
Other Ideas
If you want, you can add a little extra to your nail art, like putting sparkles on it or painting on a white tip. You could even do the white tip with a nail pen! Remember, though, when you are doing art, you get to make the choice, too!
Friday, March 23, 2012
super size hopscotch
Today, I made an outrageously sized hopscotch course! I worked on it for a long time with a friend, but our work finally paid off! Here's what you need:
a really long sidewalk chalk
Draw a bunch of connected boxes all the way down the sidewalk and fill them with numbers that go as high as you like. Then do the whole thing and time yourself!
Other Ideas
Remember, this doesn't have to be an ordinary hopscotch course. Add some interesting things to it, like places where you have to cartwheel, spin, or jump. Write little encouraging messages, too, like,"Good job!" and,"You did it!" and,"Almost there!". Or, you could do two identical tracks running on either side of the street, and race a partner to the finish! Always remember, though, that no matter what art you are doing, the choice is always yours!
a really long sidewalk chalk
Draw a bunch of connected boxes all the way down the sidewalk and fill them with numbers that go as high as you like. Then do the whole thing and time yourself!
Other Ideas
Remember, this doesn't have to be an ordinary hopscotch course. Add some interesting things to it, like places where you have to cartwheel, spin, or jump. Write little encouraging messages, too, like,"Good job!" and,"You did it!" and,"Almost there!". Or, you could do two identical tracks running on either side of the street, and race a partner to the finish! Always remember, though, that no matter what art you are doing, the choice is always yours!
HOPSCOTCH
|
| me doing a cartwheel |
| follow the purple brick road |
| cartwheel |
| bouncy, bouncy, bouncy |
| the end |
| apple tree |
Thursday, March 22, 2012
secret code
Today, I found a coded letter I once wrote to myself. I did this a long time ago, so I don't remember what the code is, so I don't even know what it says! Here's what you need:
paper pencil
Think up a number or symbol for each letter of the alphabet. Then, write a secret message, story, or song with your code! It looks really cool if you just do the alphabet over and over and then frame it.
Gzitk Ortql
Oy ngx pxlz vqfz zg rg ziol qkz ygk sggal qfr fgz ygk vkozofu qezxqs vgkrl, ngx eqf pxlz doj xh kqfrgd lndwgsl zg dqat oz sgga egga. Gk, ngx egxar vkozt q ltfztfet gk hqkqukqhi ziqz ngx ziofa iql, zitf zkqflsqzt oz wtsgv. Ktdtdwdk, qskfu vozi qkz ekdtl zit eikoet!
(This is what is written below in code!)
Other Ideas:
If you just want to do this art for looks and not for writing actual words, you can just mix up random symbols to make it look cool. Or, you could write a sentence or paragraph that you think has meaning, then translate it below. Remember, along with art comes the choice!
Wednesday, March 21, 2012
cartoon math
Today, I drew some cartoon math. It took a long time, but my math teacher was really impressed! Here's what you need:
paper pencil
sharpie
Write a title on the top of your paper. Then, think of a rule for the function box. Draw a big box in the middle of the paper with conveyor belts connecting to the front and back. Draw all the numbers going through the inside of the function box. Label everything to make it more clear.
Other Ideas
Make sure to go over your title and other important things with a sharpie to make them stand out more. You could also draw the numbers going through outrageous phases inside the function box, or draw a crowd of stick people watching the numbers going through the dreaded box. But remember, if you ever get a package in the mail labeled, "art", then there will also be a tiny little box that is labeled, "choice".
Subscribe to:
Posts (Atom)